by Yasin Ali, PGA Teaching Professional (Former Tour Player), Leadbetter Golf Academy Dubai, JA The Resort
If you find that getting out to the course is tough going for you, have no fear, spend this off season improving your pivot with this simple drill. We at the David Leadbetter Academy believe that ‘a correct pivot motion is the life blood of any athletic swing’. The beauty of the piston pivot drill is that it doesn’t require a golf club, all you need is some space, a mirror or window (and in my instance I’ve used a chair) as a prop to highlight some points to help you move your body better. So let’s get started.
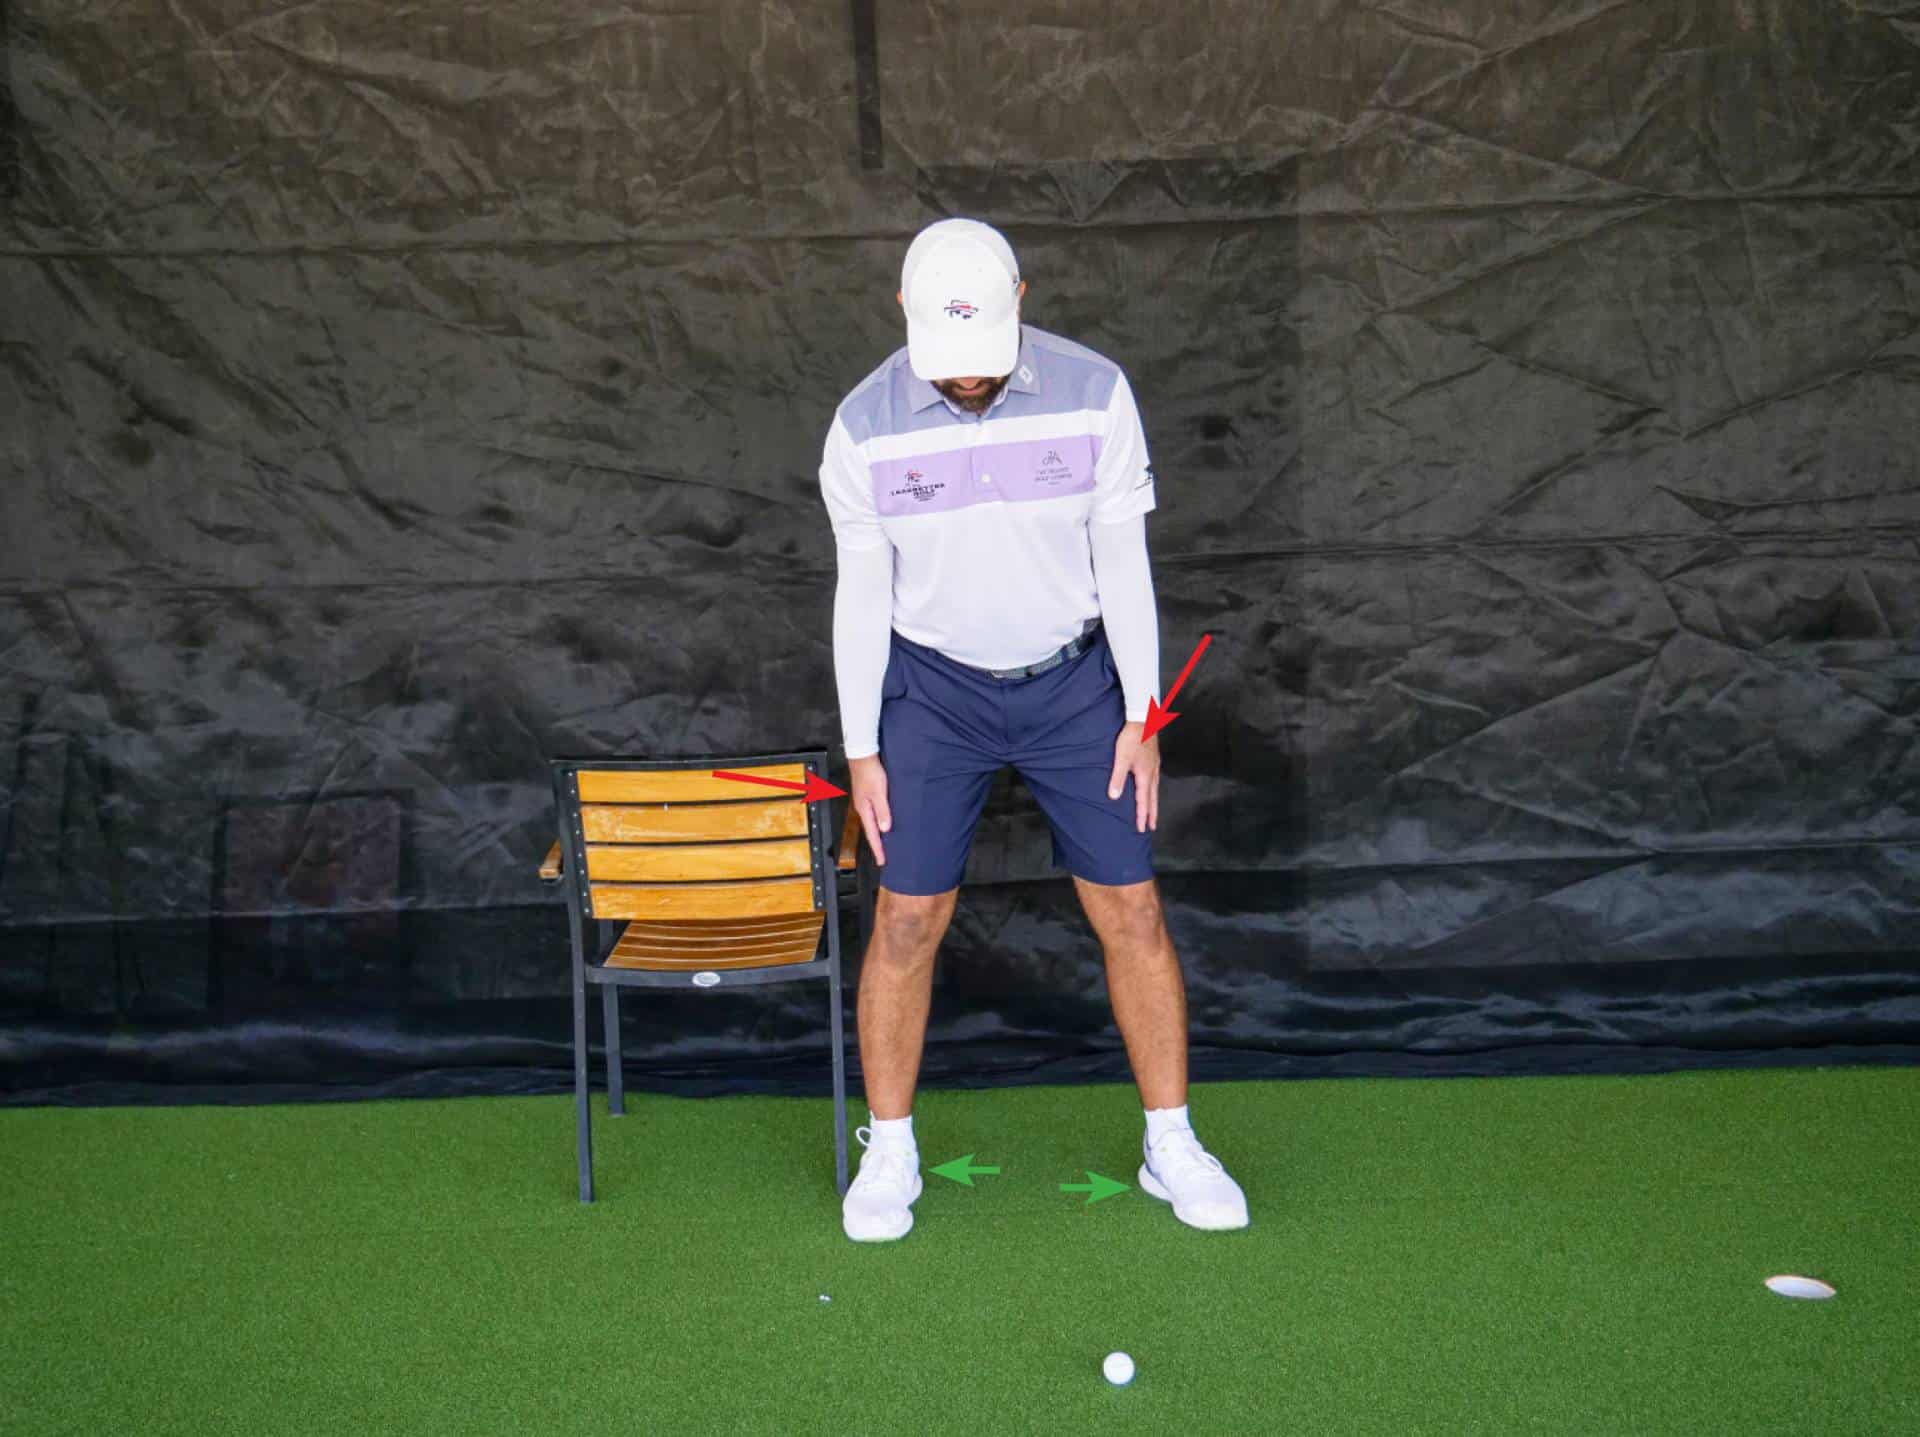


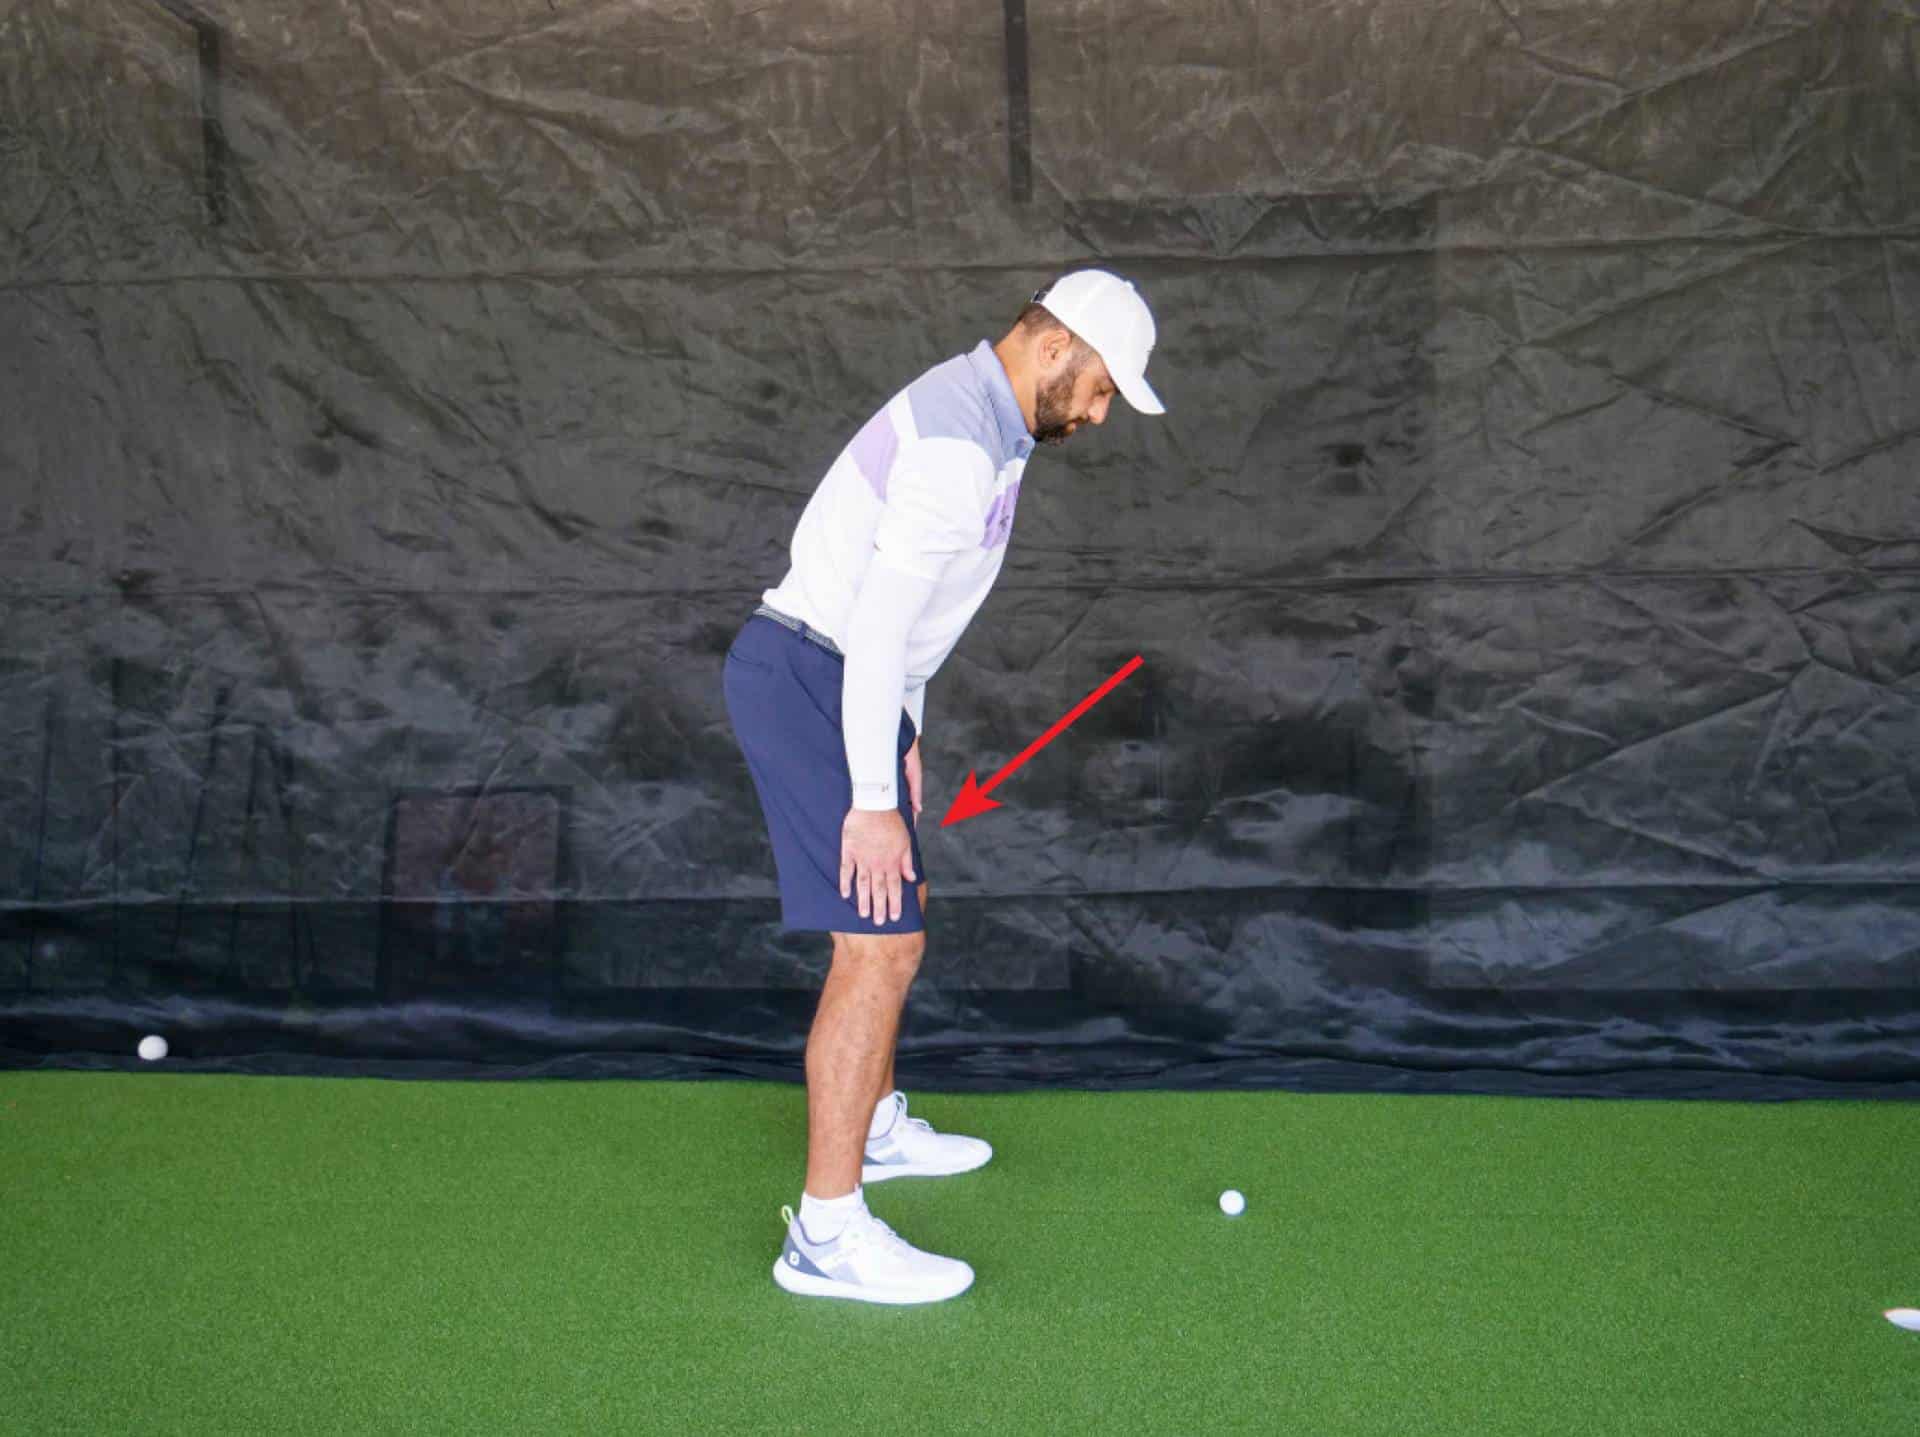
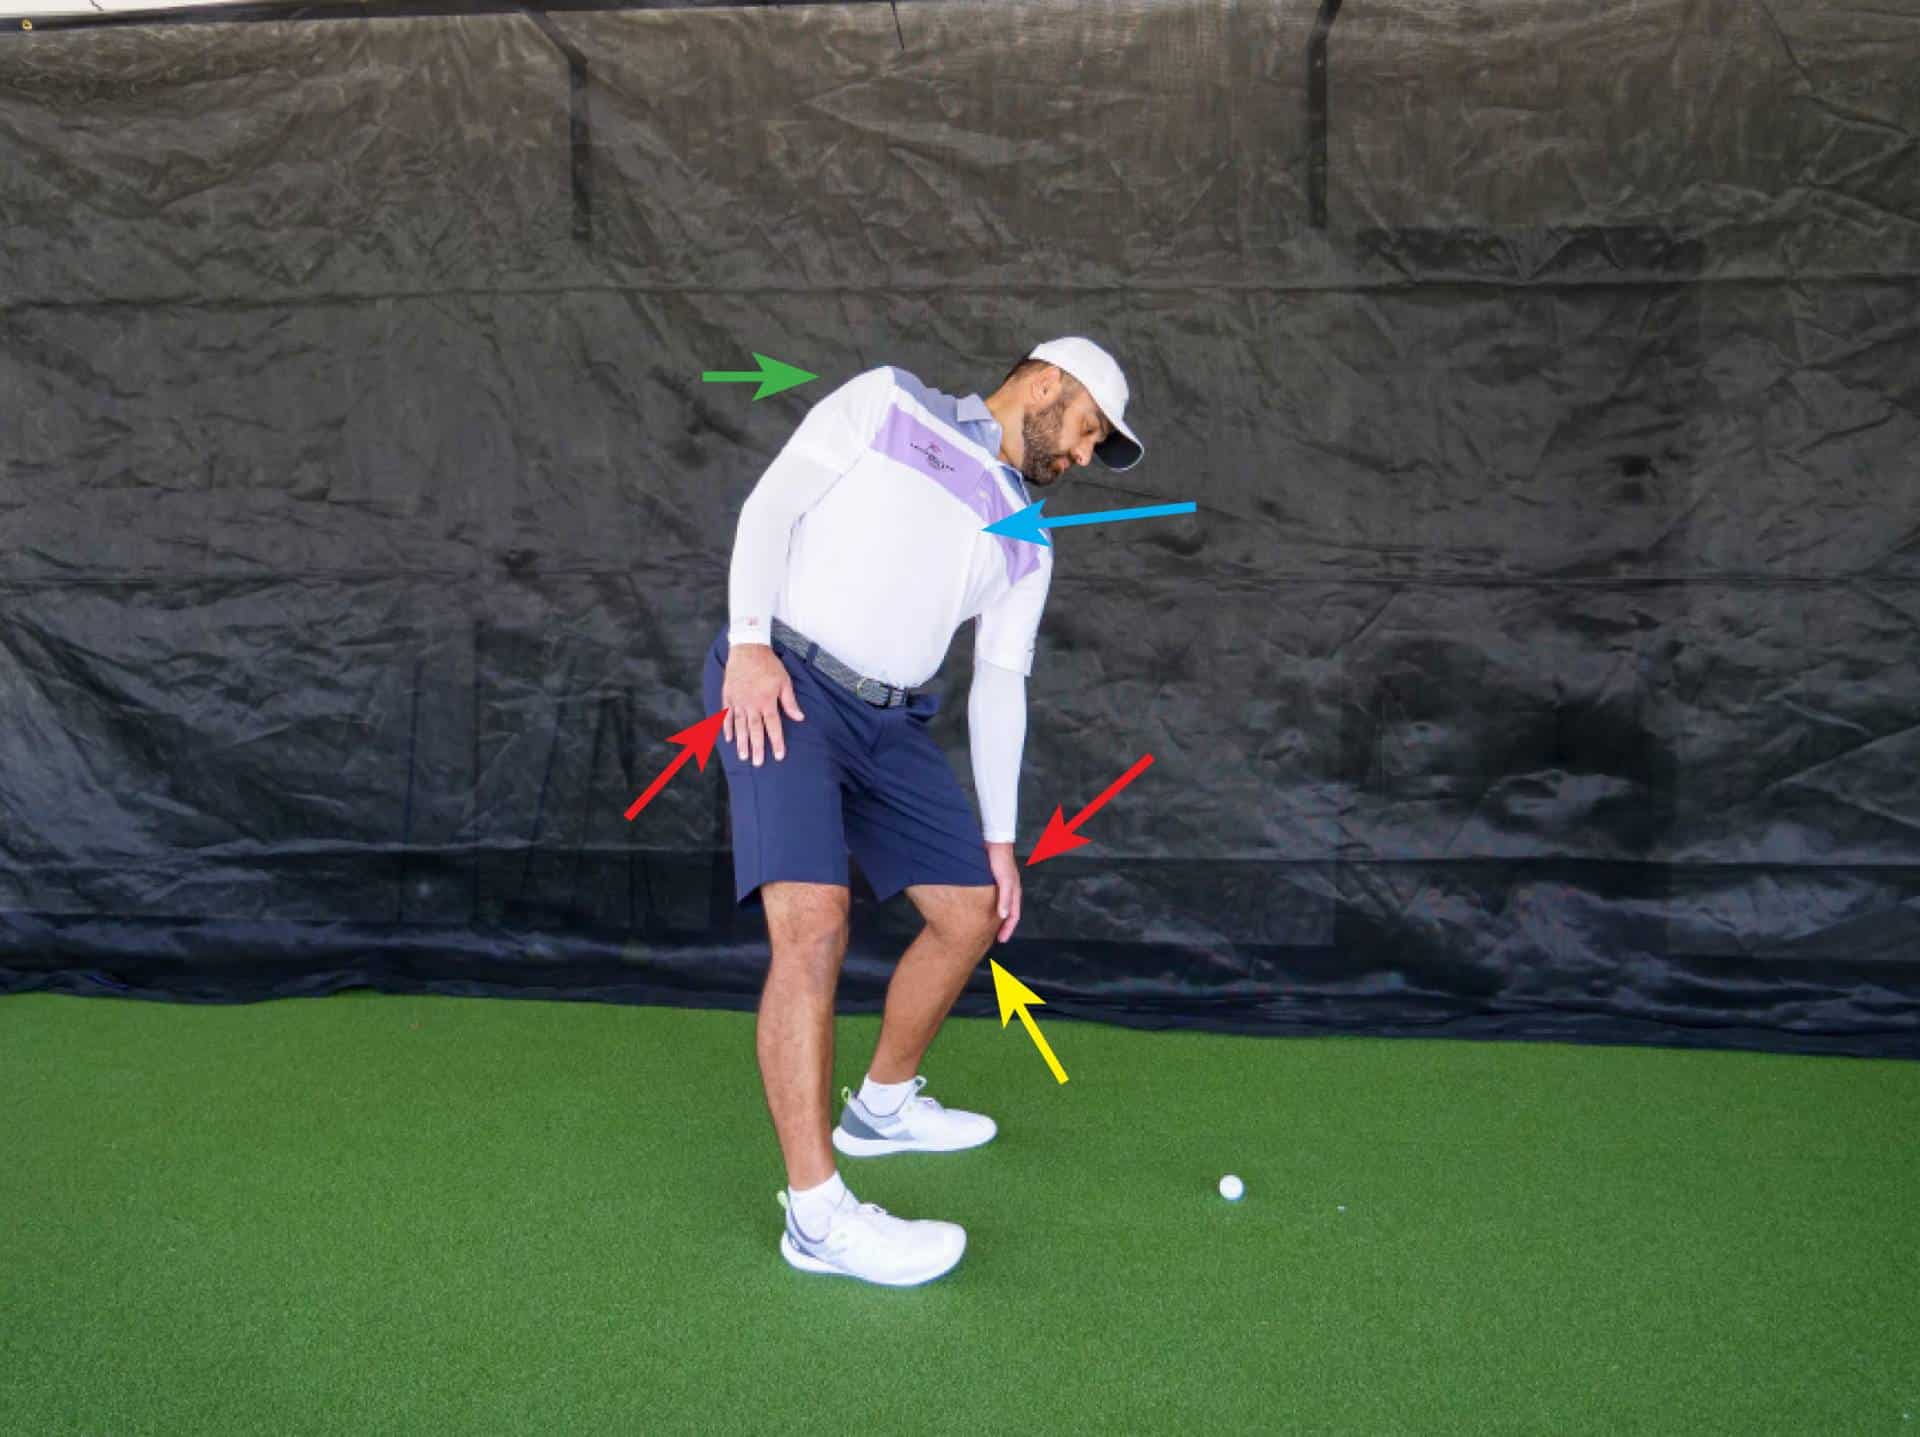
1 – Athletic Posture
We are going to adopt our athletic posture, feet shoulder-width apart (green arrows), hands running down the outside of our thighs (red arrows) with the right hand ever so slightly lower than the left to give a little bit of shoulder tilt.
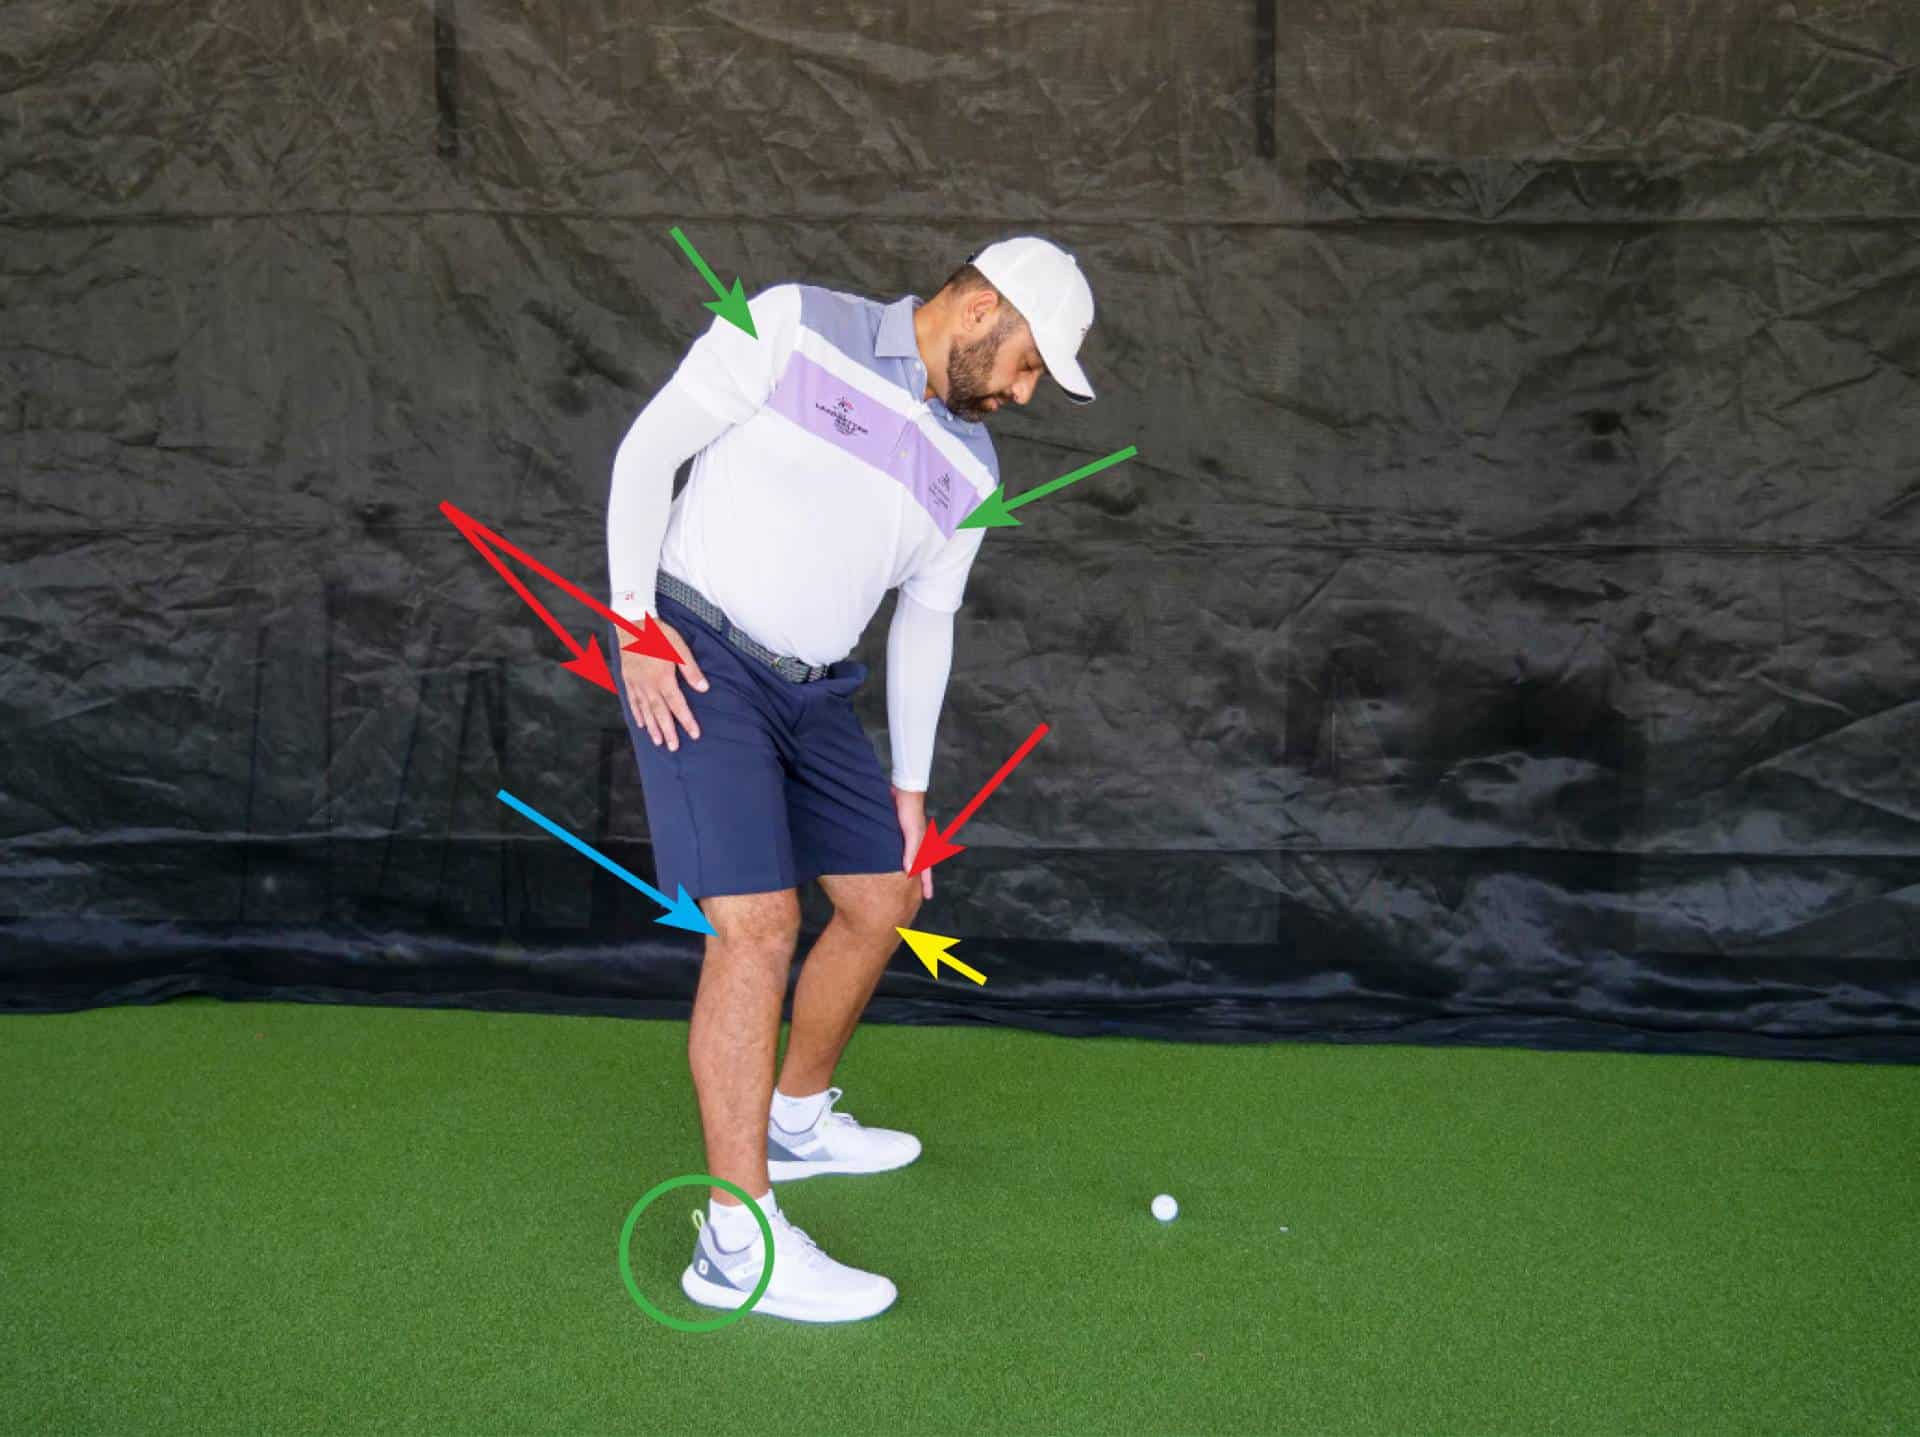
2 – Initiation
We will initiate our pivot with our core. As we move into our backswing we are going to feel that our left hand slides down our left thigh closer to our left knee and our right will slide up our right thigh closer to our right hip (red arrows). This is what our completed backswing pivot will look like.
The red arrows highlight our hand positions – notice the difference from the first image.
The yellow circle highlights how my 34 left knee has come forwards towards the ball.
The red circle highlights my stable right foot and in this position I’m feeling the pressure towards the inner part of my right thigh down my leg with pressure placed firmly in that right heel.
The vertical green line and the one angled away from it show how my upper body has pivoted nicely over my right knee and my back is facing the target.
The blue arrow shows that I’m looking at the ball from the corner of my left eye. My head has moved laterally (slightly) to my right.
Finally notice the position of the outside of my right leg and the chair which has barely changed from the beginning.
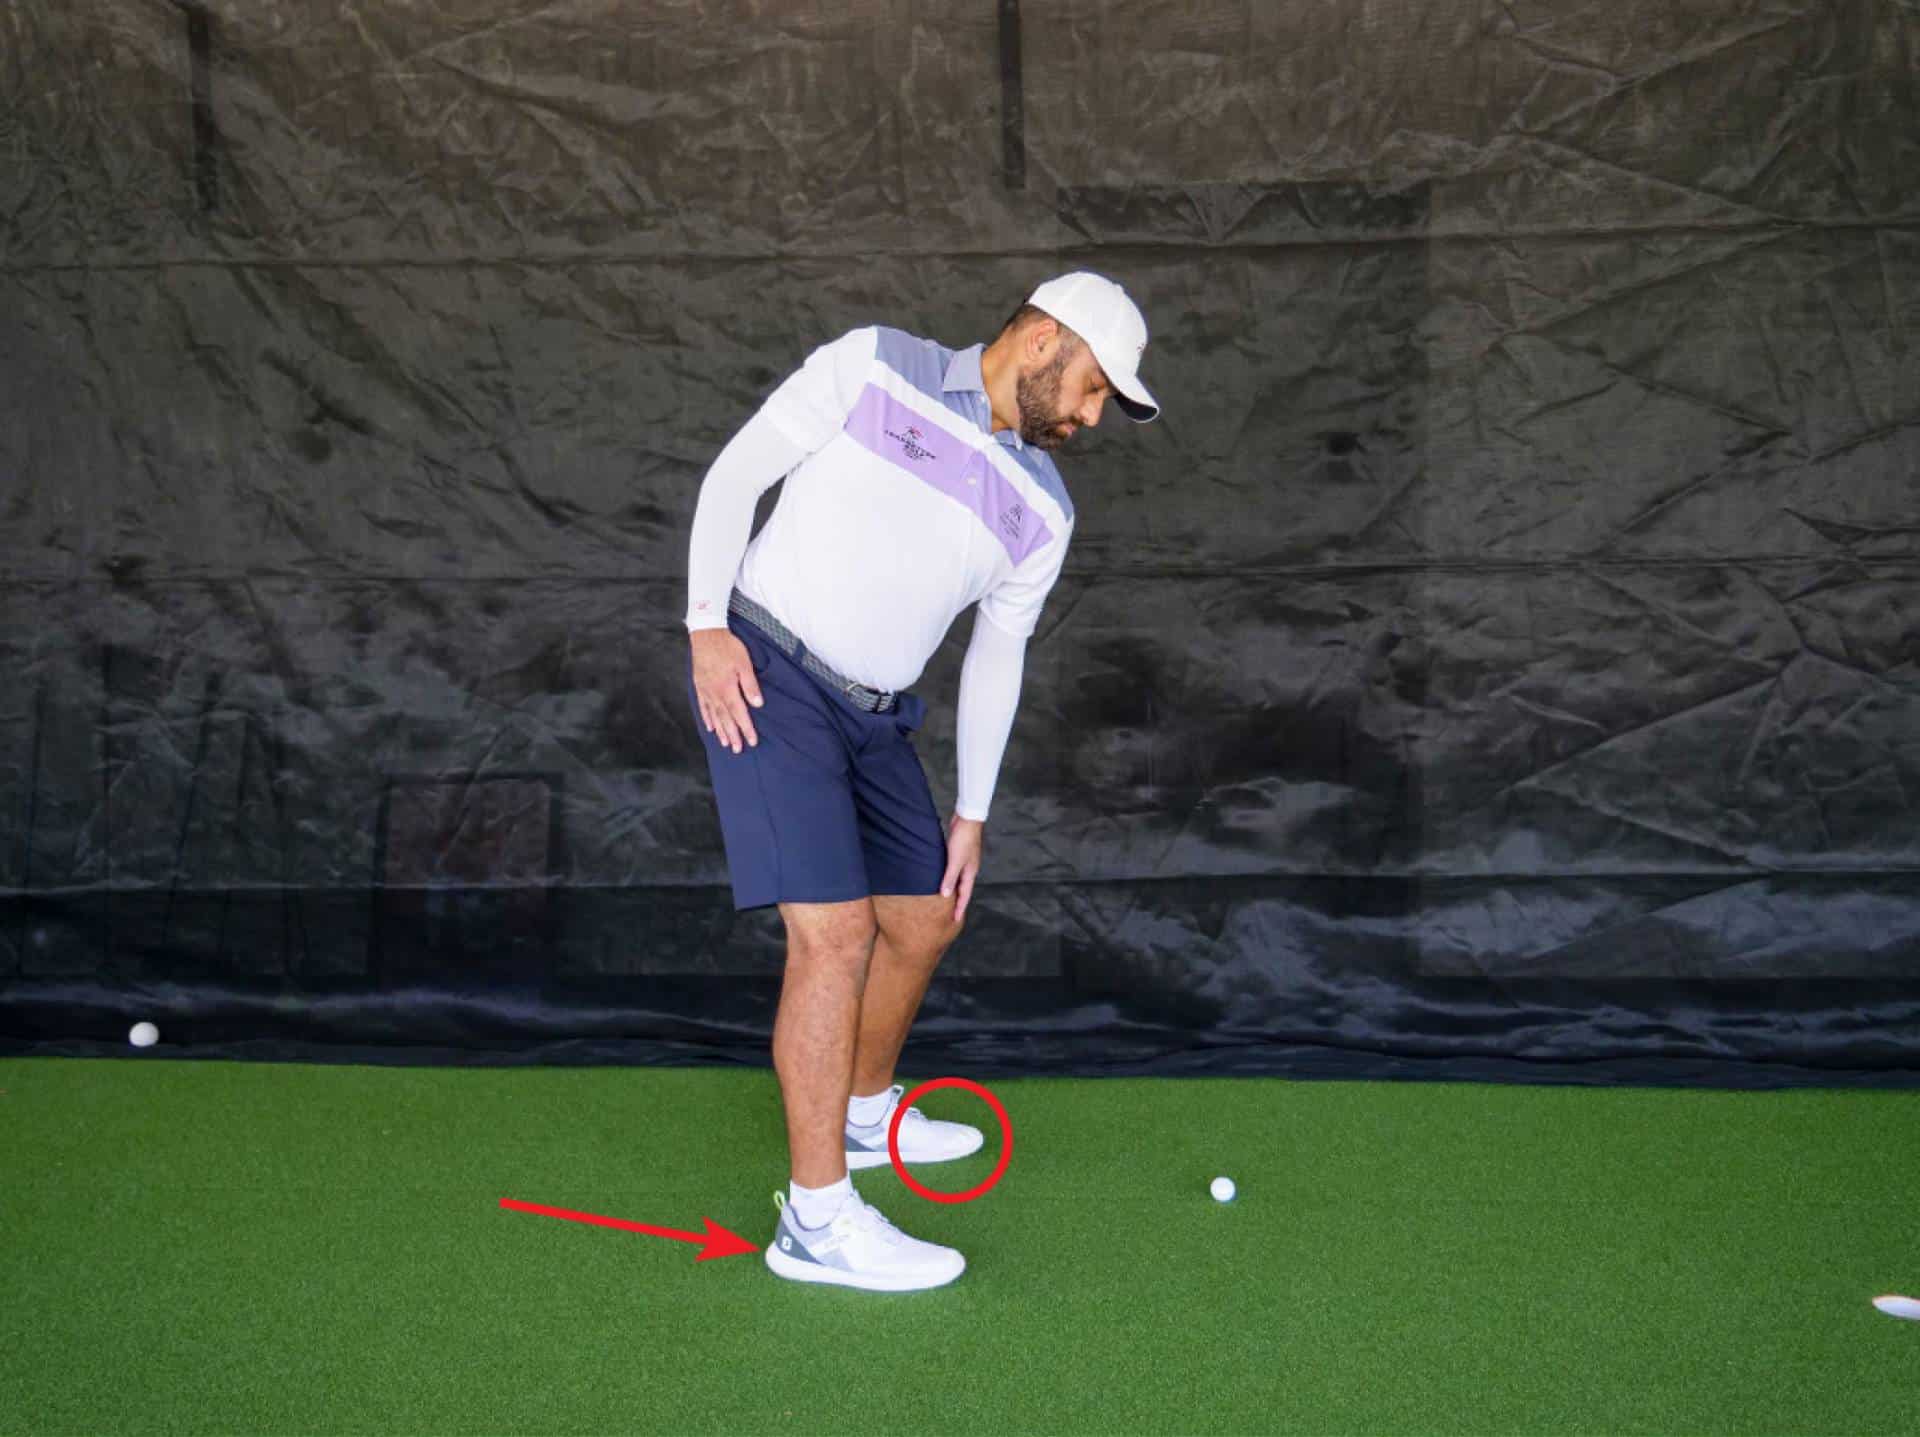
3 – The Glide
This is the glide phase of the pivot. My hips glide laterally towards the target until the pressure, which was in my right heel, moves towards the front of my left foot. Look at my right leg and the chair, notice the gap (green arrow)? This shows I have started to transfer my weight to my lead leg. My back is still pretty much in the same position as the previous image, in-fact look at the red arrows they haven’t changed. The yellow circle shows that my left knee has gone from being slightly pointed inward to now moving towards the target.
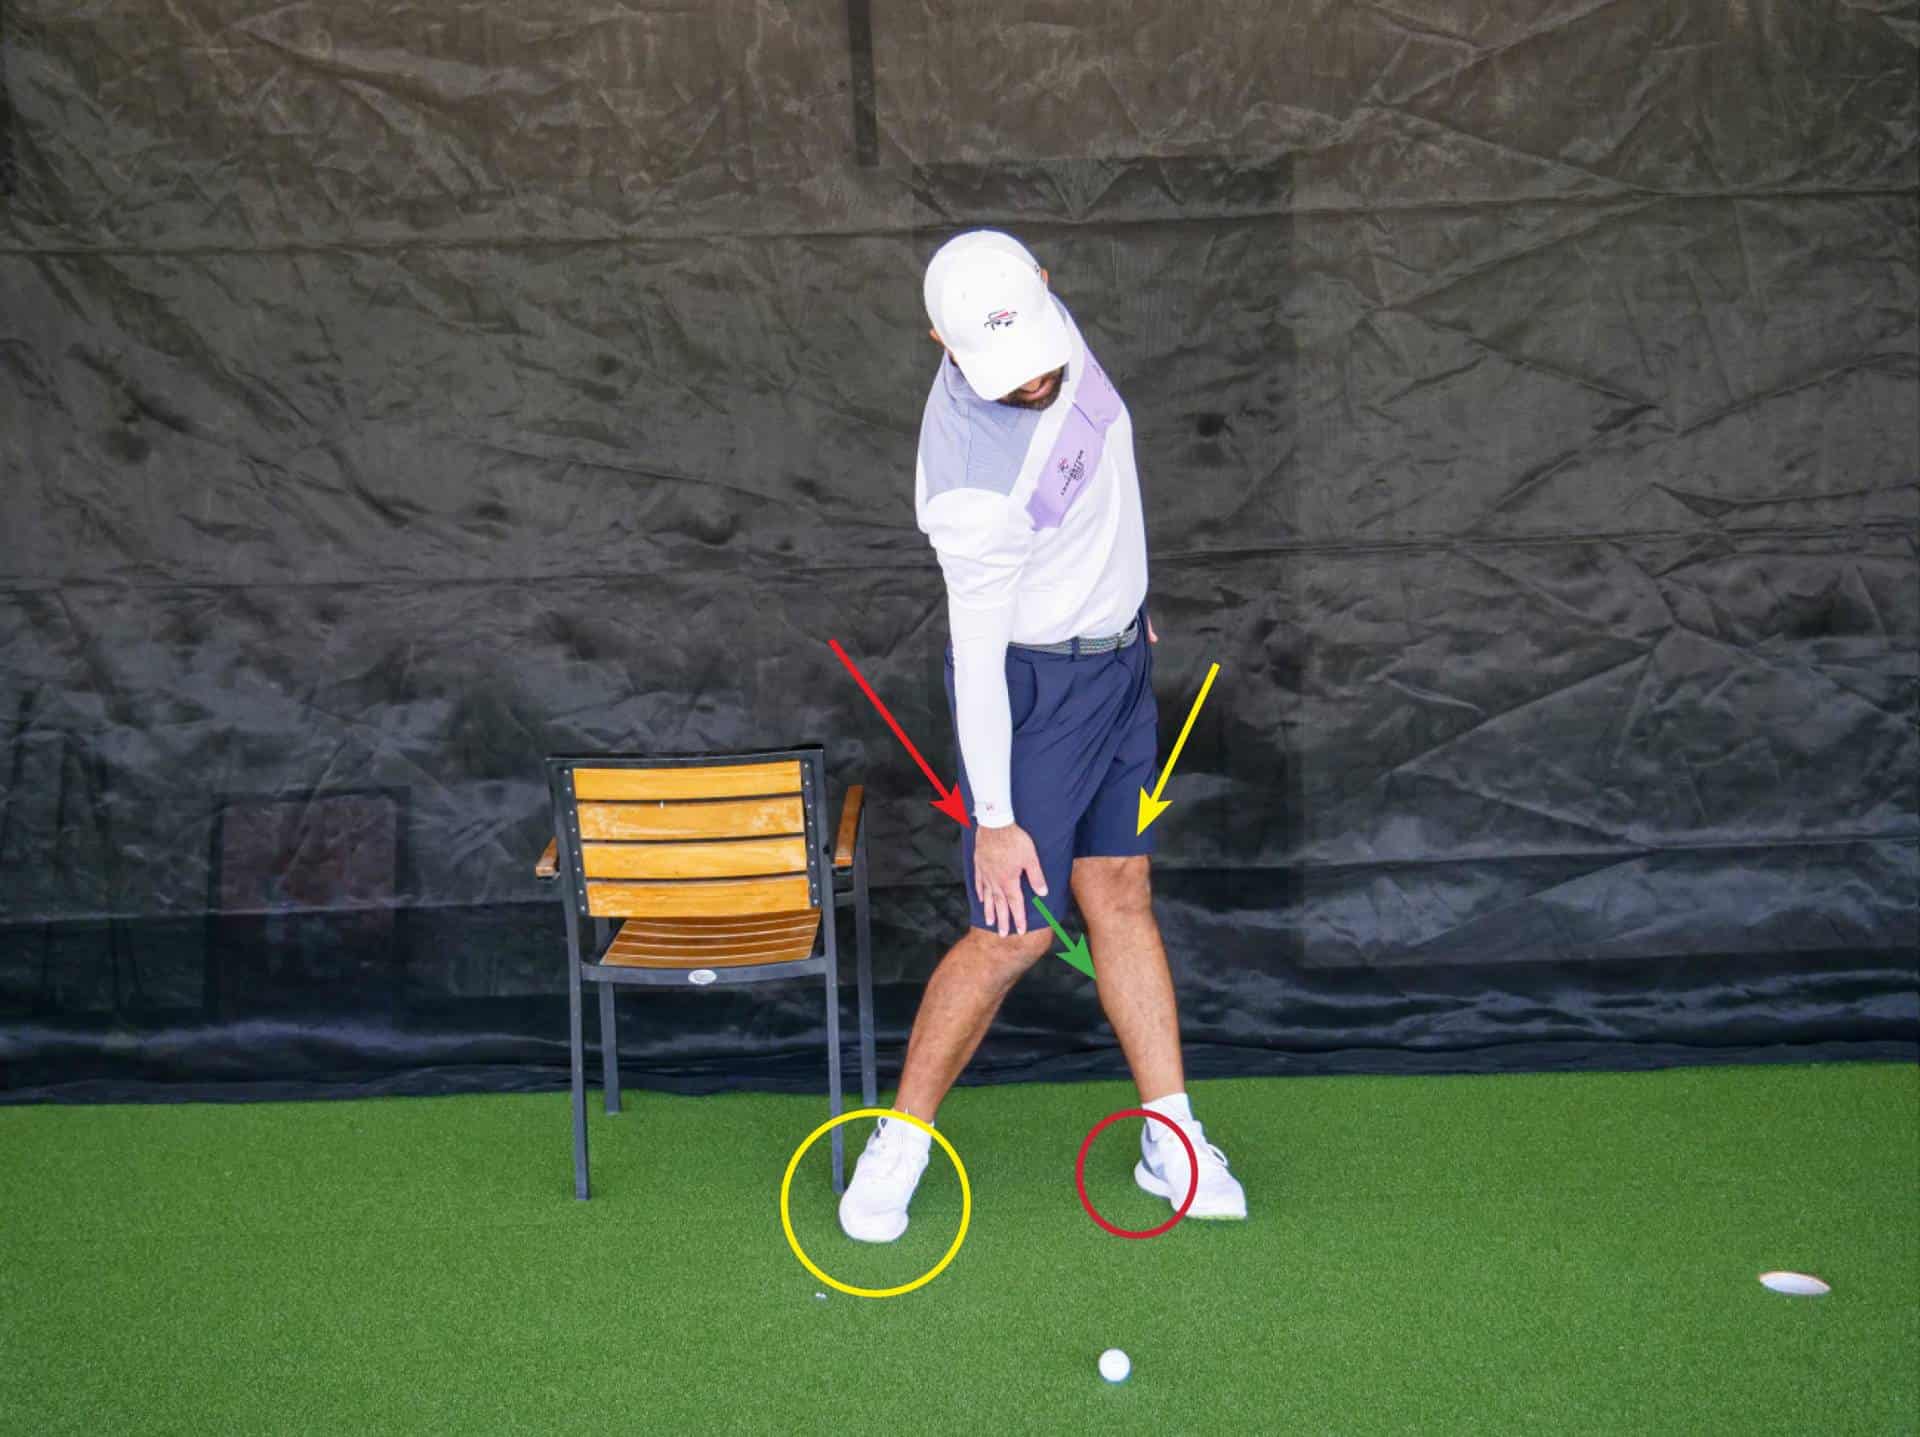
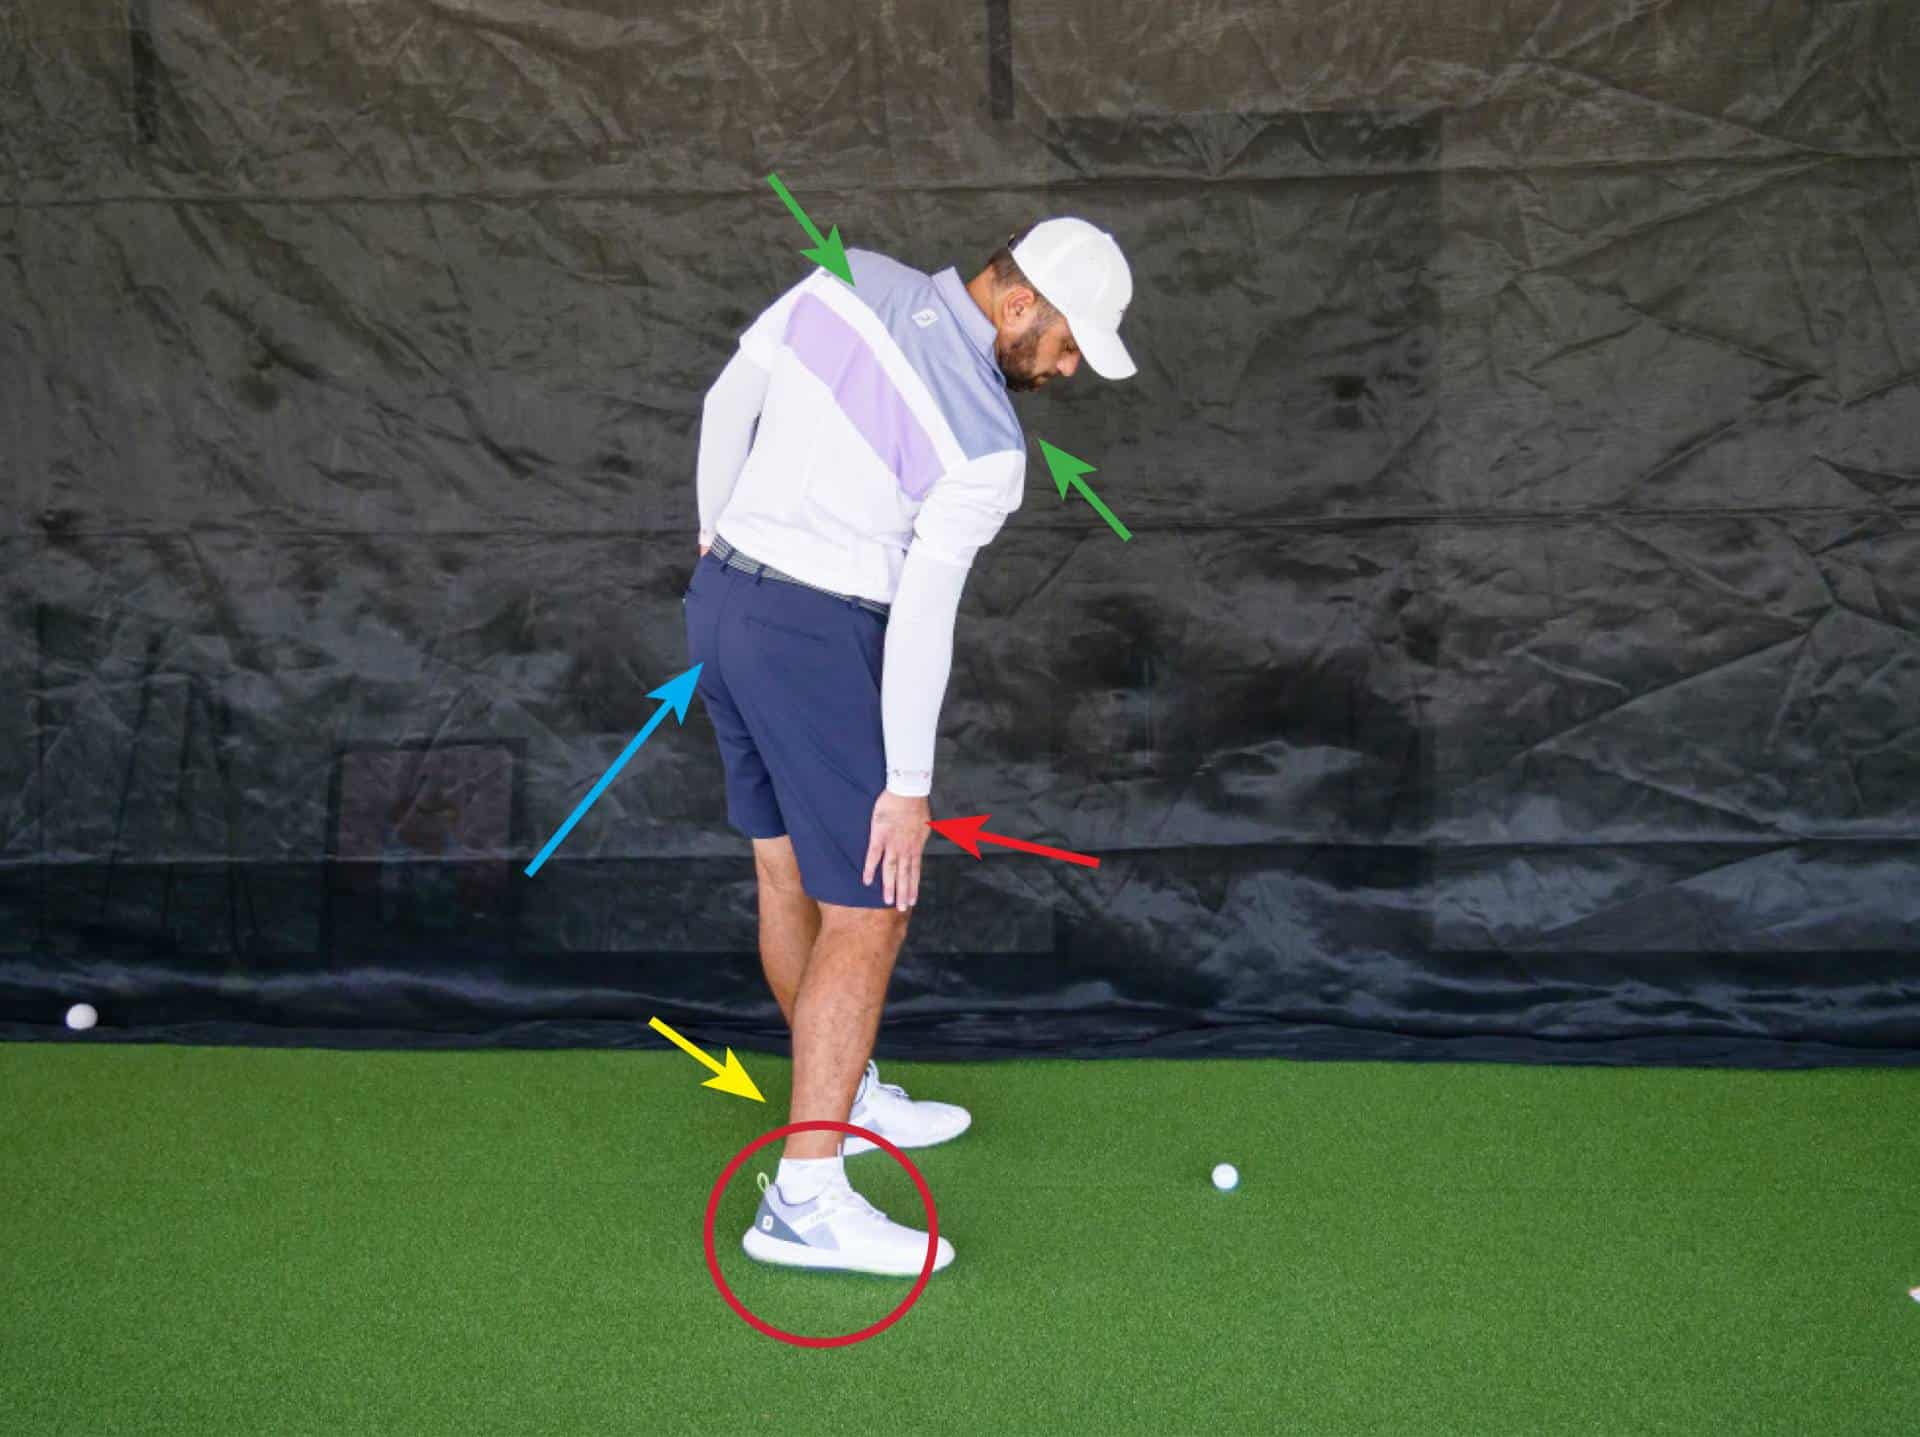
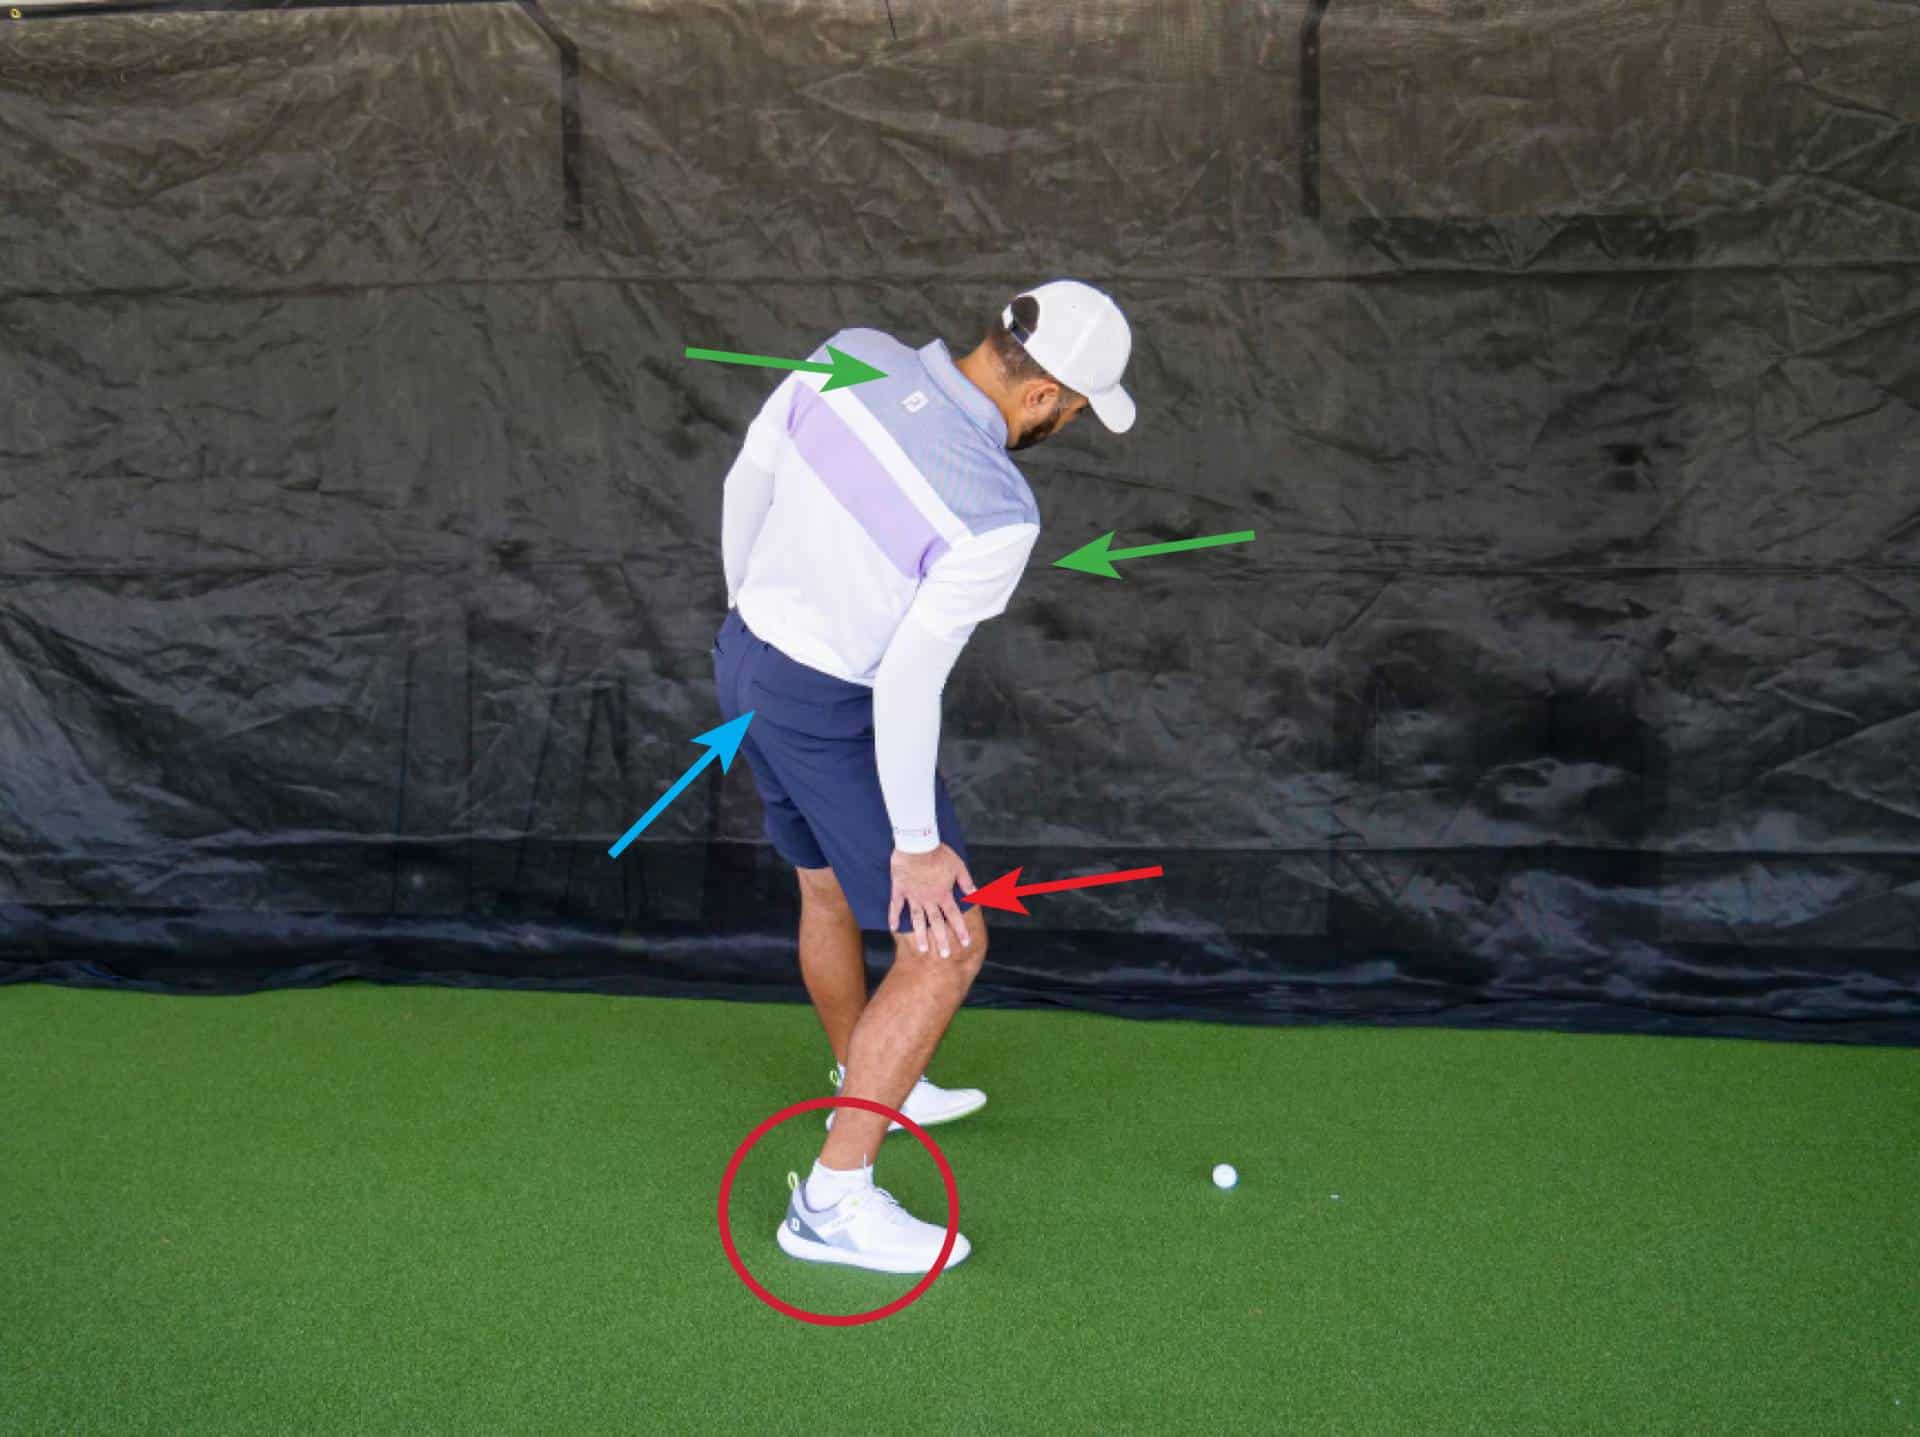
4. Weight transfer
In this final image you can see I have transferred my weight into my left side. My left knee has straightened and the left leg posts up nicely (yellow arrow) allowing me to hit against a firm left side. My right palm is down by my right knee (red arrow). My right knee is kicking in and down toward the balls (green arrow), right foot is rolling inwards helping me move into my left side (yellow circle). The pressure which was in my right heel at the top of my backswing is now in my left heel (red circle). My left side isfeelingagreatstretchandlookat the gap between the chair and my right leg, I have moved the weight successfully into my left side and there’s no hanging back.
We are now at a good stage to compare this image with how it looks from down the line, and note how they mirror each other.
Down The Line
5. Posture
Good posture with my hands down the side of my legs.
6. Completed backswing pivot
Green arrows show how my right shoulder is higher than my left. Red arrows show how my right hip is marginally higher than the left, also I’m feeling a nice bit of pressure in my right glute.
The yellow arrow shows how my left knee has moved forwards from where it was at address.
The blue arrow shows that my right knee still maintains some flexion.
The green circle highlights the pressure now being felt in my right heel and on the inner part of right leg.
7. The Glide
I’m feeling the right foot start to roll (red arrow) and the pressure is now being felt in the front of my left foot (red circle). I’m not unwinding as yet, this glide allows me to get my chest over the ball.
8. Weight transfer
Here we can see how my right shoulder is lower than my left – a complete reversal of what was happing in the backswing.
Right hand is also closer to my right knee and lower than the left (red arrow).
My left glute is unwinding and is more visible (blue arrow) and my right foot is rolling onto its instep (red circle) meaning that I’m now feeling the pressure in my left heel.
What you want to avoid


9. If your piston pivot looks like this then you have not been doing it correctly. My head is tipped over to the left past the green line (highlighted by yellow arrow). You may say that the hands are where they should be but look at that right knee, it’s bowing outwards (green circle and arrow).
Look at how the right foot is rolling outwards with the sole of my foot becoming visible.
This position is called a reverse pivot and is detrimental to your swing.
10. My chest (blue arrow) and left shoulder (green arrow) aren’t as clearly visible especially when compared against image 6. You can also see how my head looks different.This is not a good pivot.
11. My body is backing away from the target (blue arrows). My right foot is still grounded (red circle) showing poor weight transfer, and even though you could say that the other positions are almost where they should be, this is not the correct pivot.
12. Again even though it seems that my hands and shoulder look to be in good positions, you can clearly see that my right foot is completely grounded (red circle) and my left glute has not rotated properly (blue arrow).
I am backing away from the target and this is going to rob me off a good contact, consistency, power and accuracy.
I hope you can use this instruction and these images to improve your pivot and get you in shape for the season ahead.
As always we look forward to welcoming you to the David Leadbetter Academy Dubai at JA The Resort to help you improve further.