
By Yasin Ali – The David Leadbetter Academy Dubai at JA The Resort Golf Course
If you find that you’re struggling with your bunker play, why don’t you try my ‘sand on the club face’ drill to help keep the loft on the club face and get that ball soaring out of the trap with a nice high trajectory.
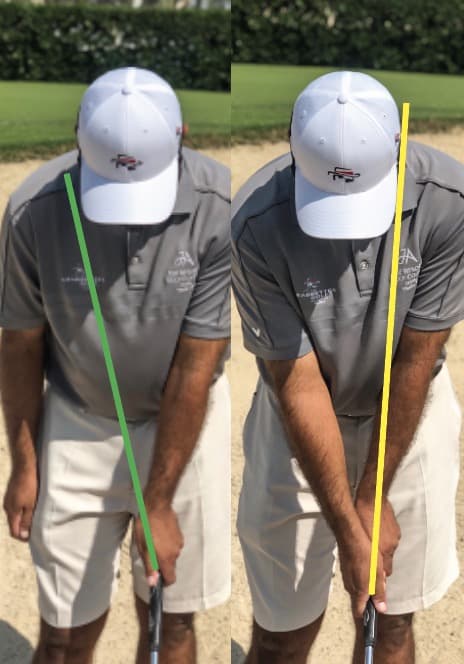
The first thing we want to do is get the club face nice and open and then adopt the ‘prayer’ grip, which requires a nice strong left hand and a weak right hand.
The correct setup
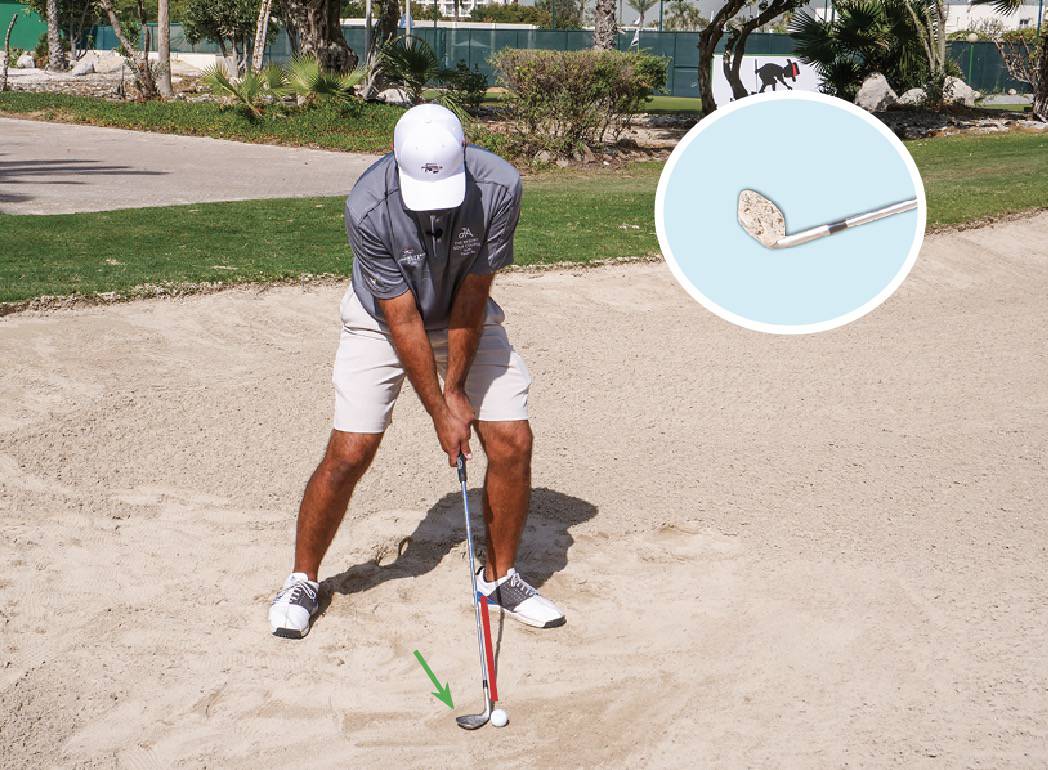
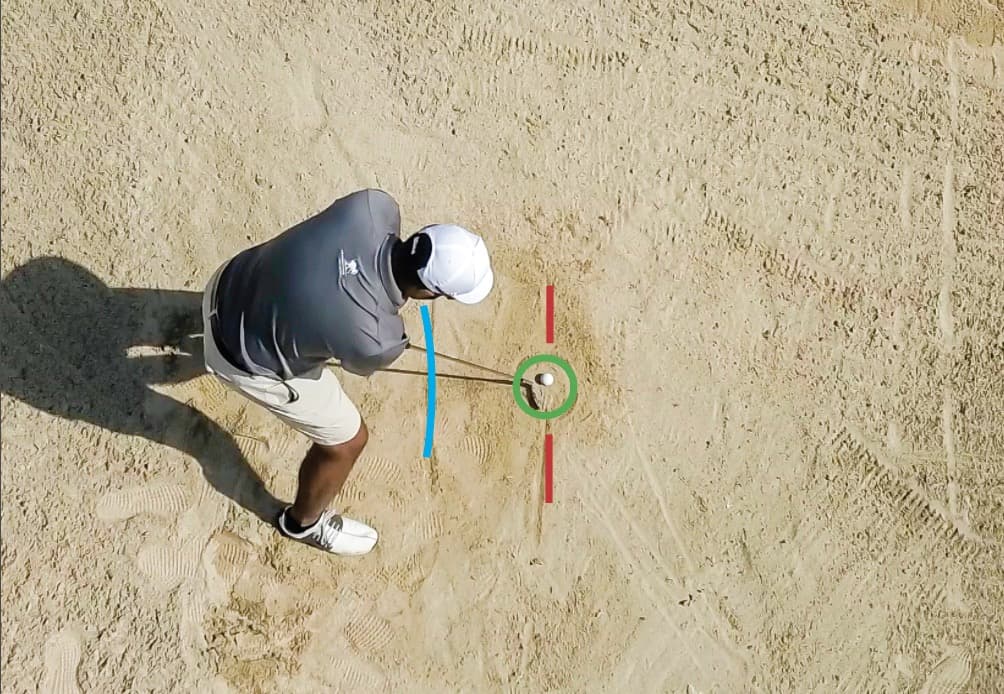
I like to have a nice wide base with my feet, I want them planted and feeling solid to ensure my stability. The ball is positioned opposite my left heel (red line) and my hands and shaft are in line with the ball. We don’t want any shaft lean in the shot (i.e. hands ahead of the ball toward the target).
I have a good amount of knee flex with the weight favouring my target leg at a ratio of 60 to 40 percent, my hands are nice and low and the club face is nice and open (green arrow).
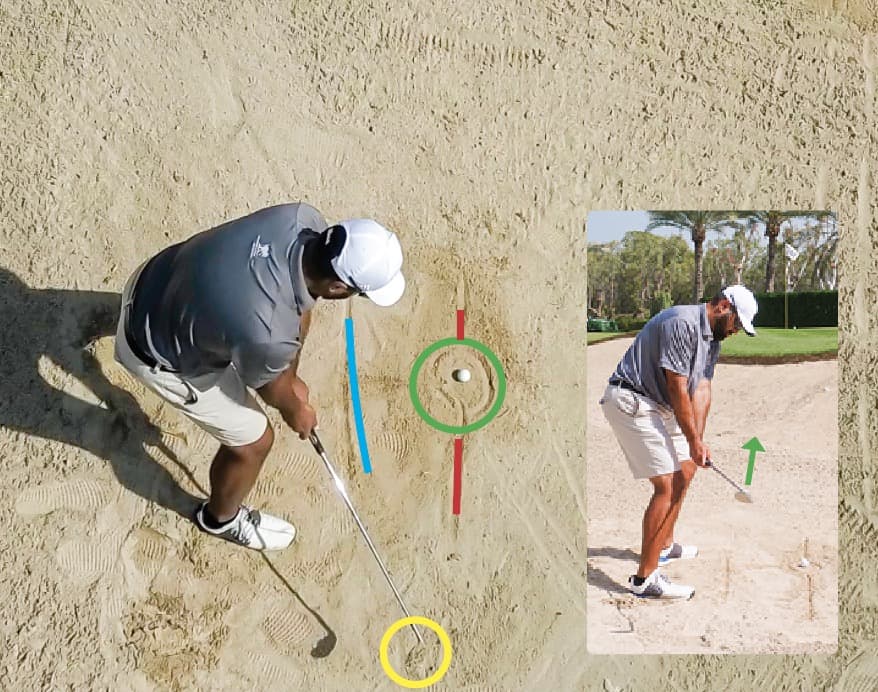
We will then put a heap of compacted sand on the club face, with the goal being to keep it there at least halfway into my backswing.
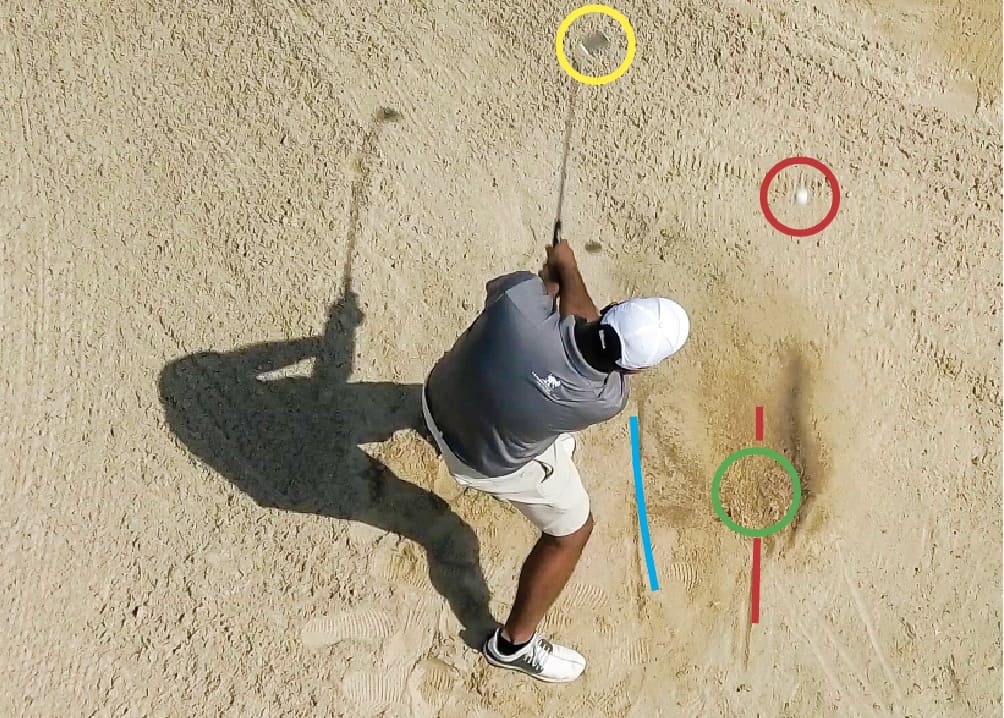
- In this next image the red line highlights my ball target line, the green circle highlights the two and a half inch circumference around the ball I’m focused on hitting. The blue line is my toe line and as you can see is aligned left of my ball target line. With the bunker shot we want to be open and not parallel.
2. In this image I’m halfway through my backswing. The yellow circle highlights the sand that I have kept on my club face which basically shows I’ve maintained the loft I set at address.
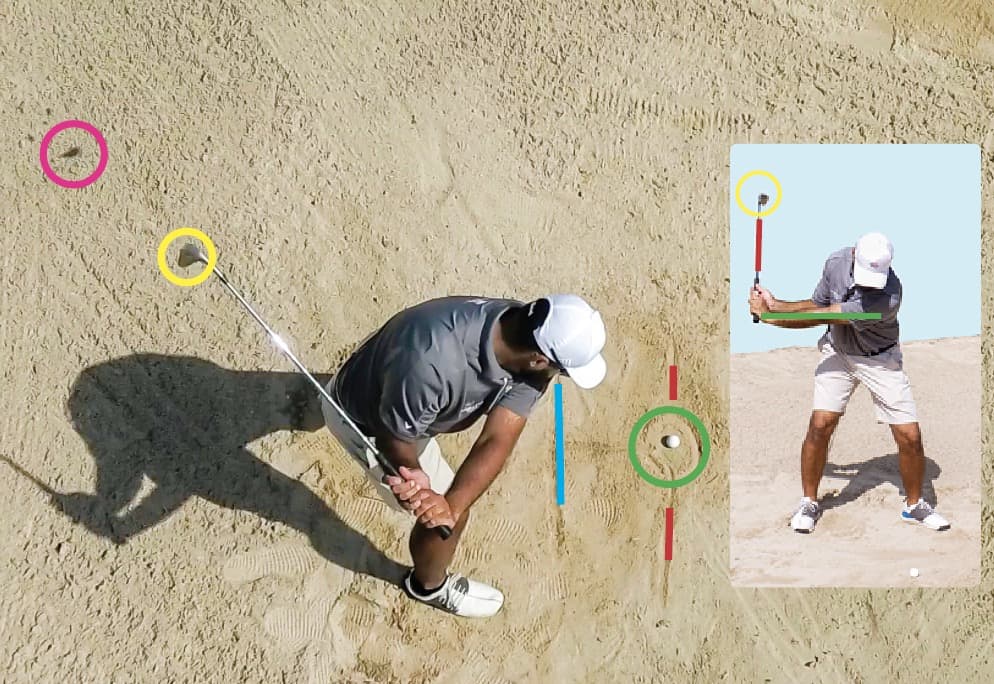
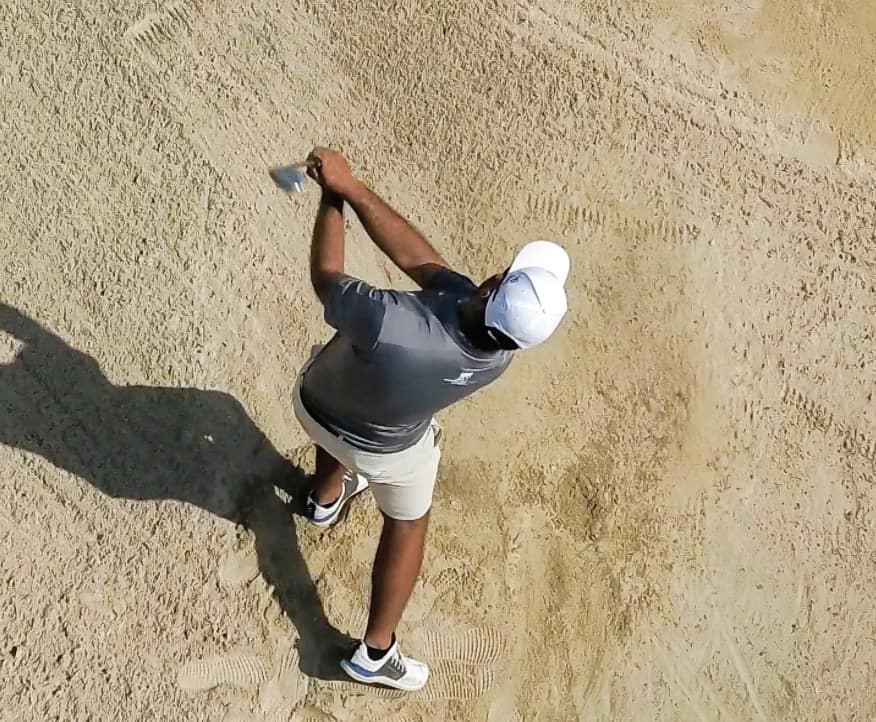
3. In this image the pink circle highlights the sand I’ve tossed over my shoulders. The yellow circle highlights the loft on my club face. The face-on image highlights the ‘L’ shape in my backswing which will be mirrored in my finish.
4. In this image you can see how I have impacted the start of the green circle. The yellow circle highlights how the ball is already on its way up and out of the bunker.
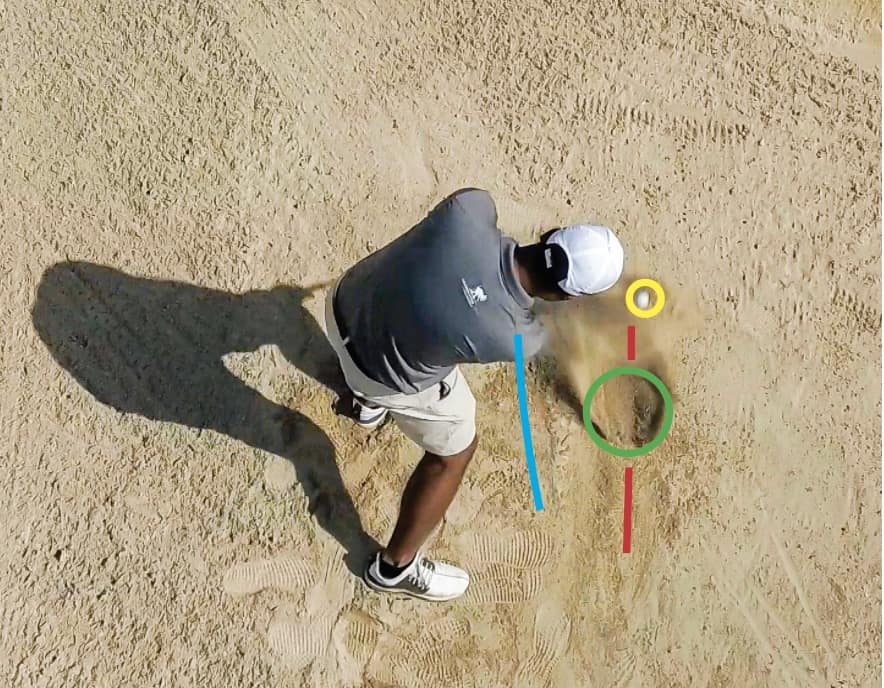
5. In this image the yellow circle highlights how the club face has passed under the ball and maintained its loft (grooves are clearly visible). The red circle highlights the ball’s position. If this was a normal golf shot the ball would have been out of the frame, but here the ball is moving up as well as forward.
6. This final image shows my finish, the L position I have in image 3 is mirrored in this frame.
Remember, the bunker shot is the only shot in golf where we don’t hit the ball, instead we want to impact the sand a couple of inches before the ball and aim to exit a couple of inches after. Keep an ear out as to what sound the club makes when it impacts the sand, a well executed bunker shot has a distinct “thump.”
I’m confident that once you practice this shot you will find that getting out of the bunker will be easy as pie, if not, then it would be my pleasure to welcome you to The David Leadbetter Academy Dubai at JA The Resort Golf Course, where we can help correct your bunker play.